
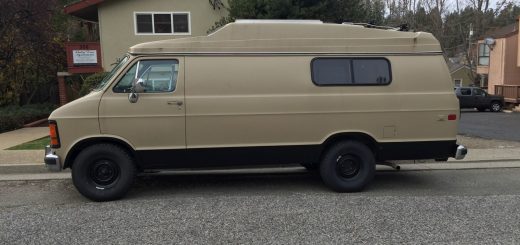
Big Blue version 4.0 – It’s getting exciting
In my last blog post I was waiting for a single part to finalize the interior walls and ceiling. It was just a simple antennae wire that I needed to put in place before I buttoned up the ceiling boards, which had a domino effect on everything else that could not be buttoned up. Once that wire was in place – the day after my last blog post – things started taking off. Here comes the fun stuff!
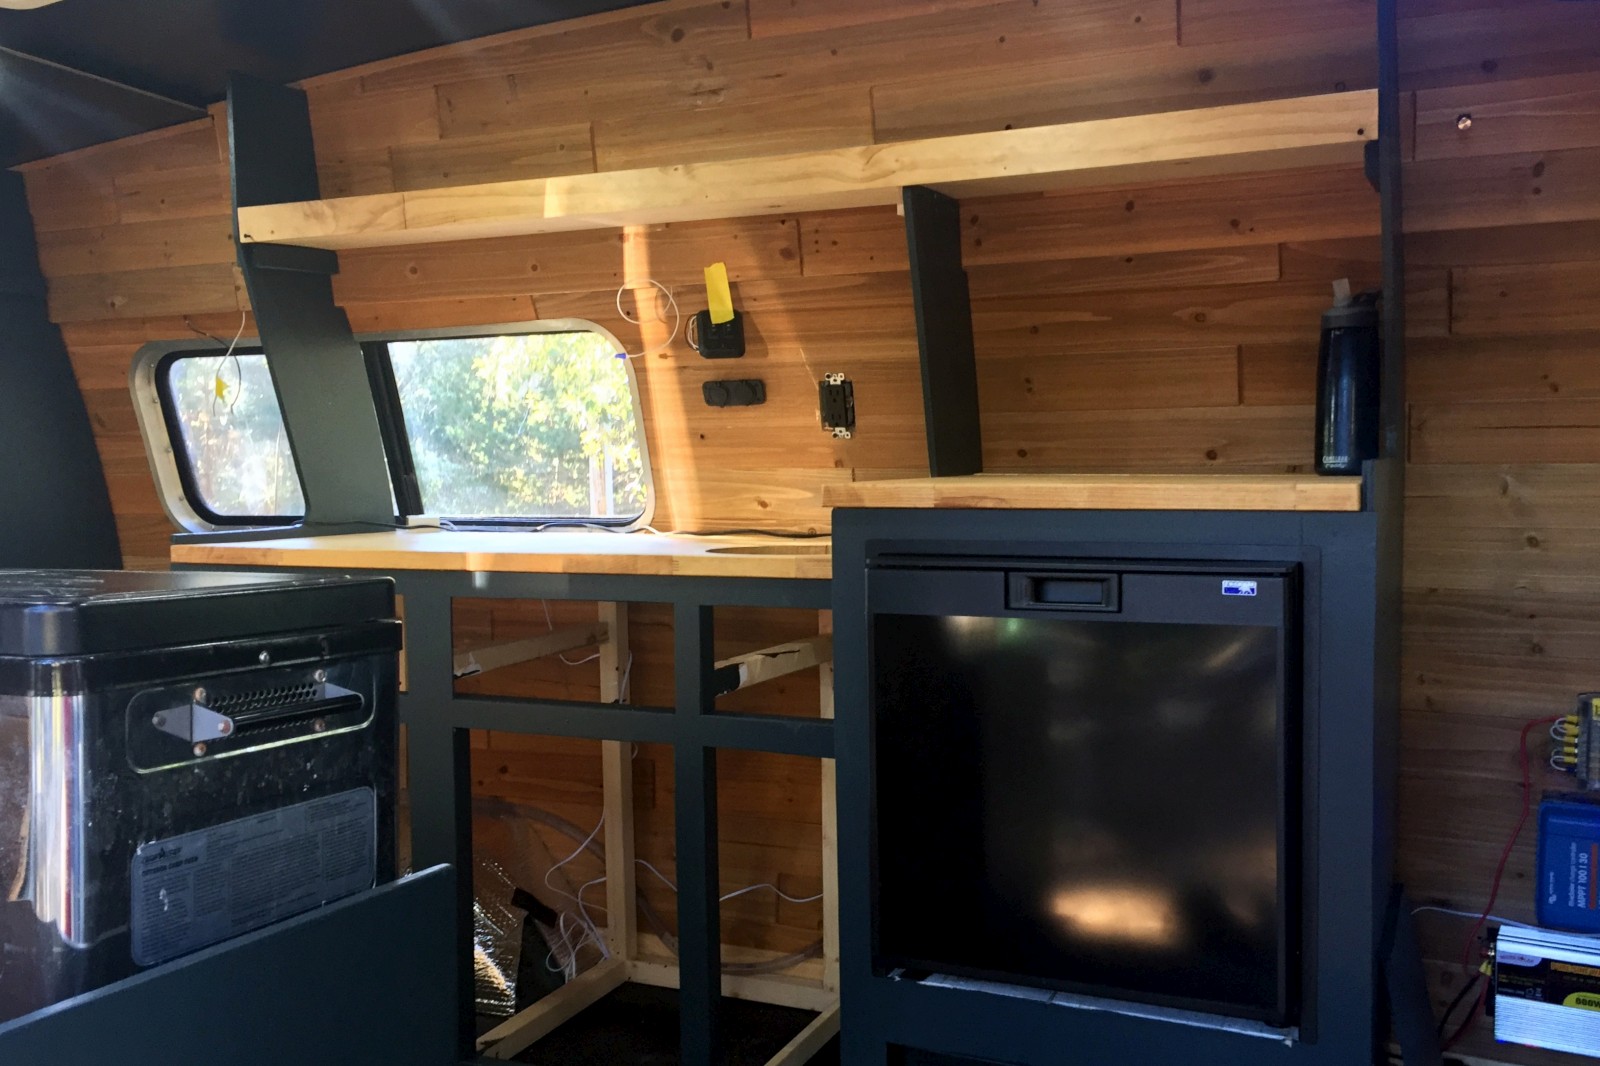
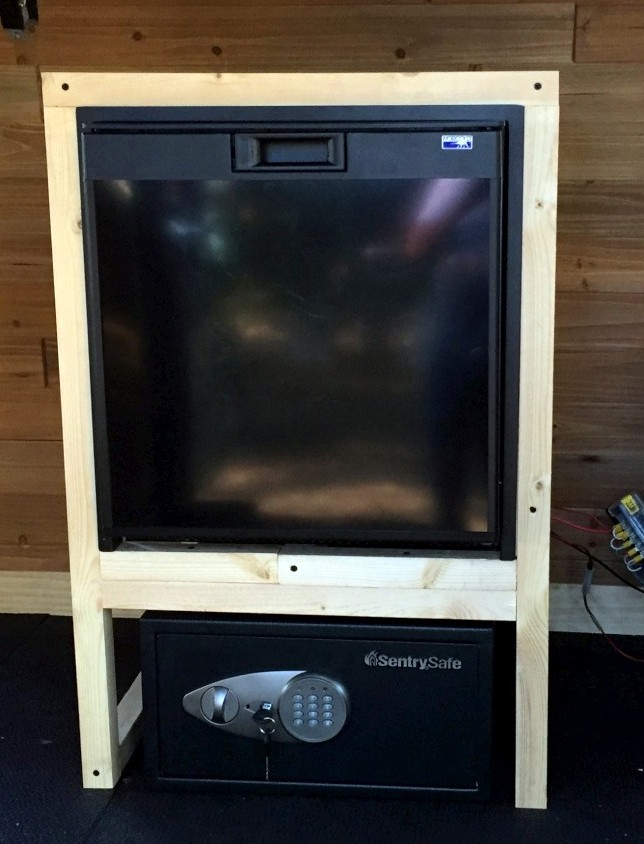 First was to install the fridge as all else in the van would be built off the fridge location and placement. Kerri and I finalized some adjustments to the placement and built out the simple cabinet that would house the new appliance. In the last iteration of Big Blue, the fridge sat at ground level, making it not-so-easy to load or unload, and damn near impossible to find that one item you wanted buried deep in without having to lay on the van floor. This time around it is raised to a more manageable height as well as relocated immediately behind the driver’s chair. Well, not immediately behind. This time, I left just enough room for that chair to be rotated 180 degrees and actually used by someone… with legs. Under the fridge goes the Lithium battery, the 120 volt smart-charger, and a safe large enough to hold our valuables while we are out on a hike.
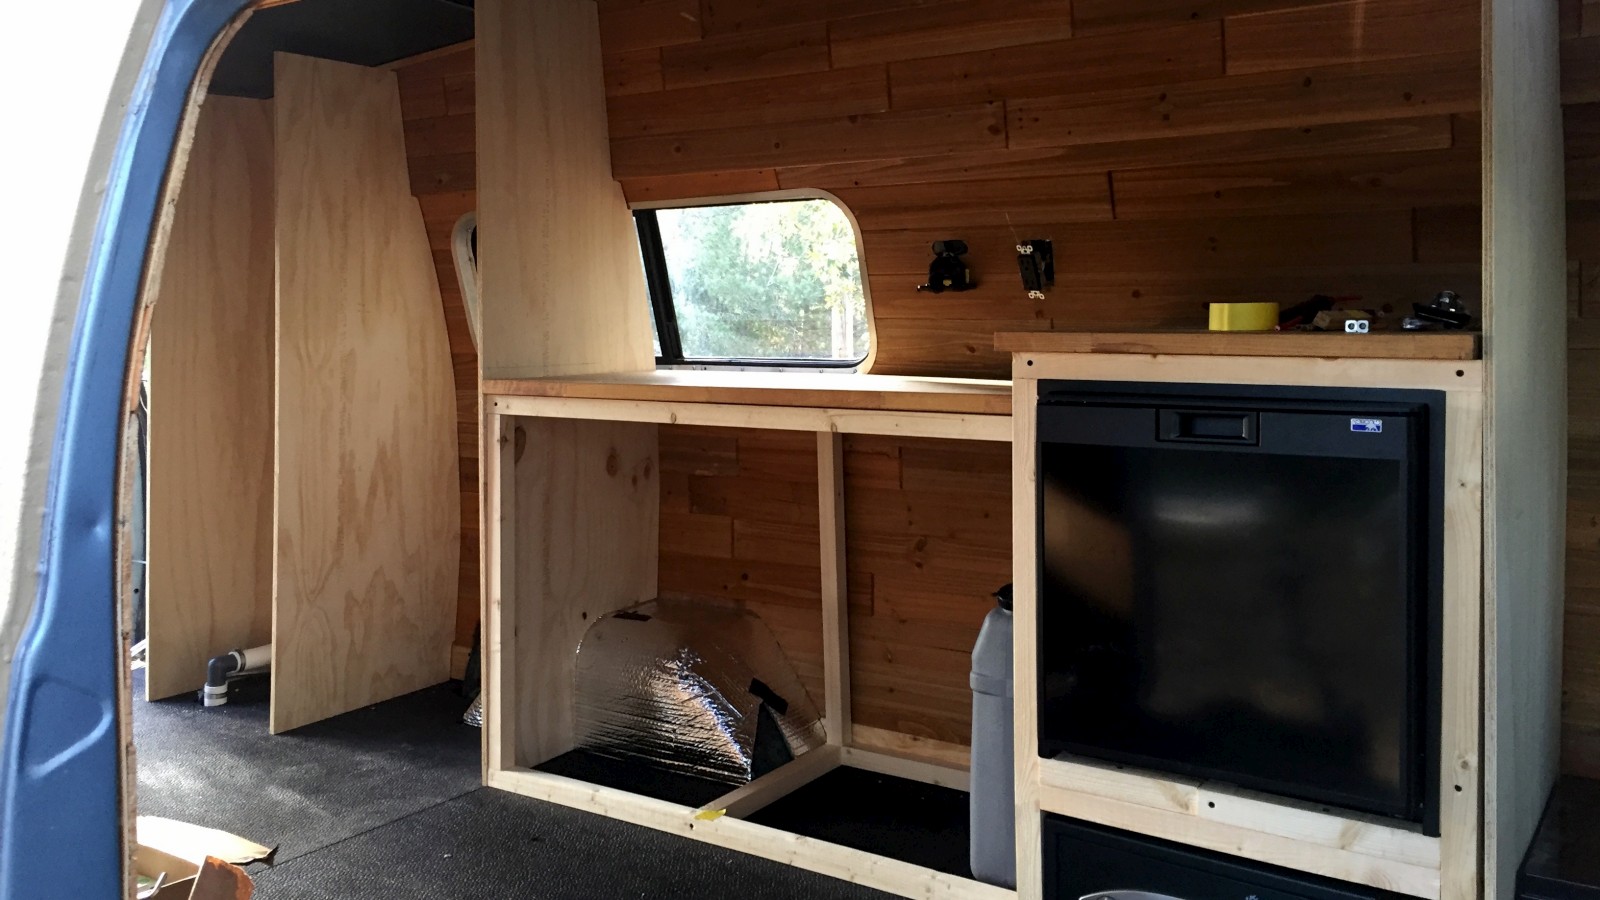
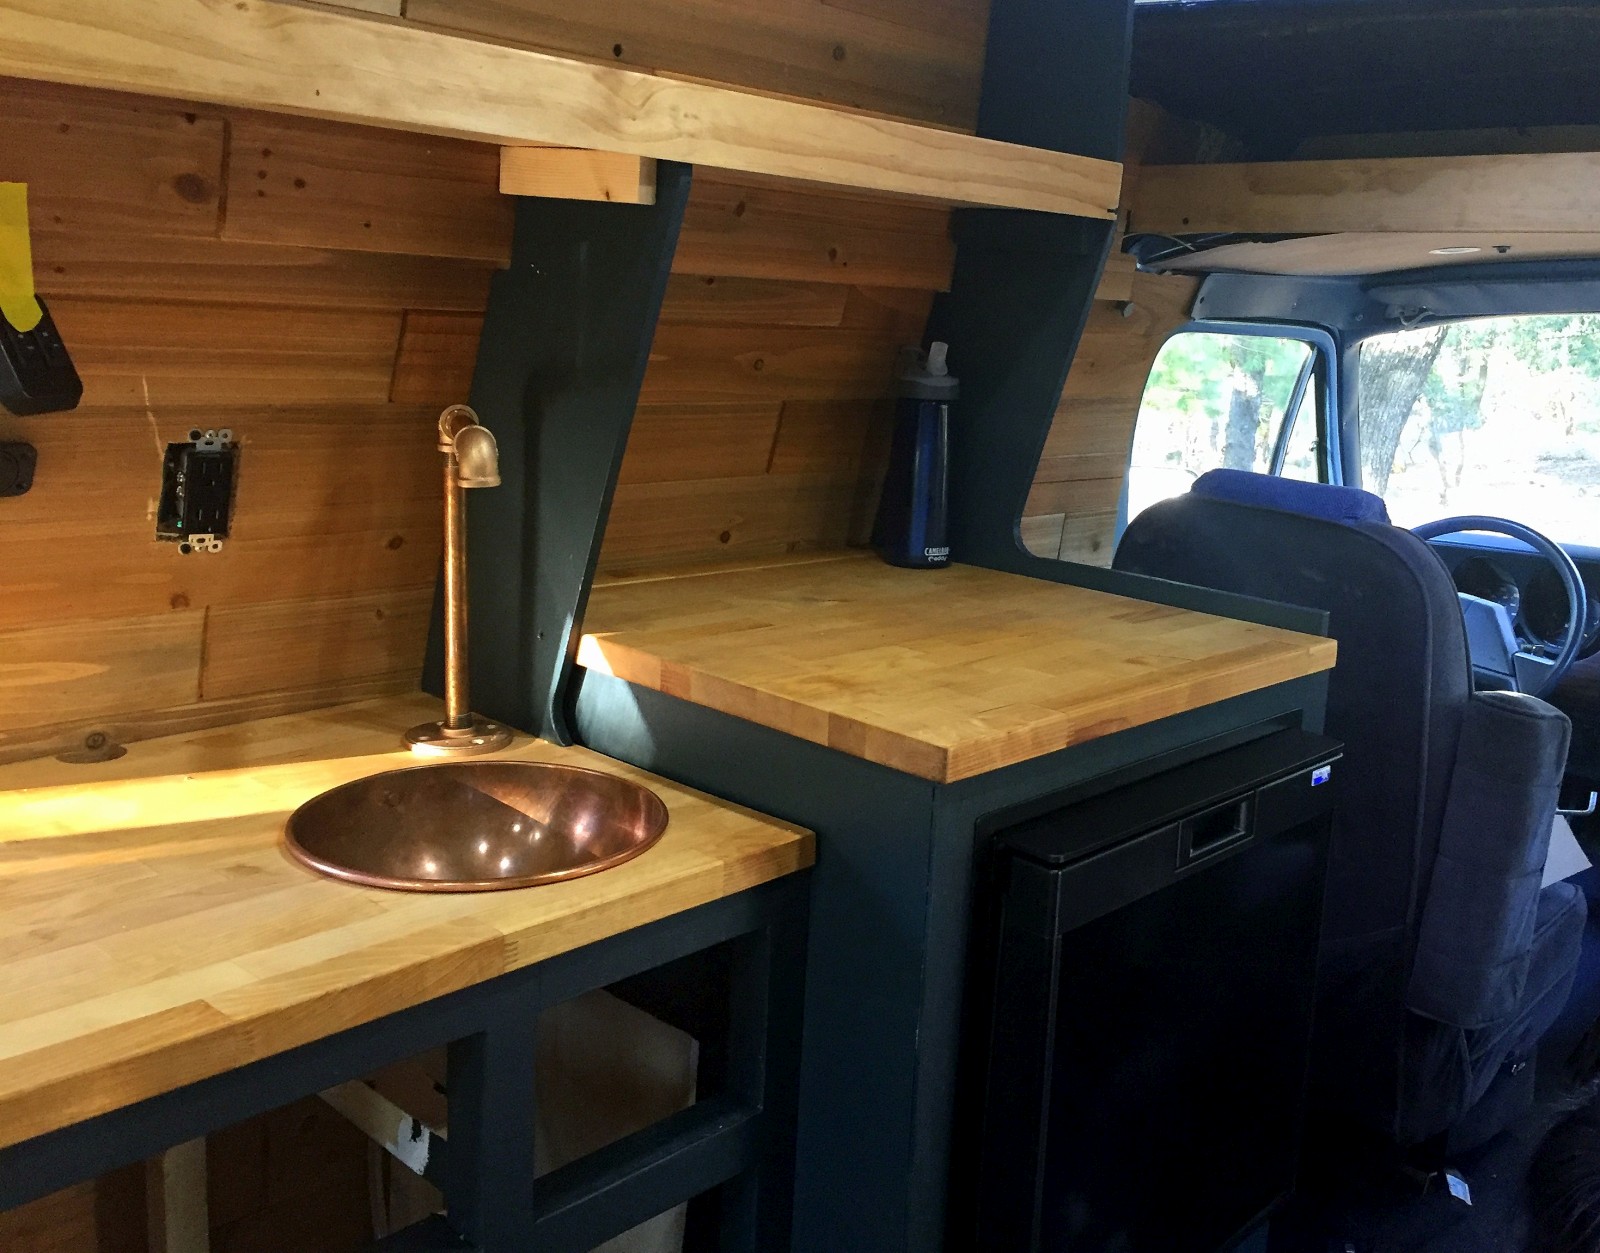
Once the fridge cabinet was placed in Big Blue, things started getting exciting. The main counter top and cabinet was the next project. Forty six inches long, and 20 inches deep, the cabinet was a big one. It would not only hold nearly all the food and other supplies, it would also be the home to the new sink, faucet, foot pump, and water jug. But first, my very elementary cabinet making skills had to make something large and square enough to work. It was the ‘square’ part that I have a problem with. Making all the necessary joints and angles line up has never been my strong point. Luckily, the rubber floor is quite forgiving and allows me to be slightly off here and there and the floors will conform to those mistakes. Another good reason to have a rubber floor when one is a beginner cabinet maker.
Since the fridge has been raised, the large counter was split into two pieces and tiered. This prevented our window from being blocked by the butcher-block counter top while still allowing the fridge cabinet to be taller. Not only is that cabinet taller, it is also four inches deeper to handle the large appliance.
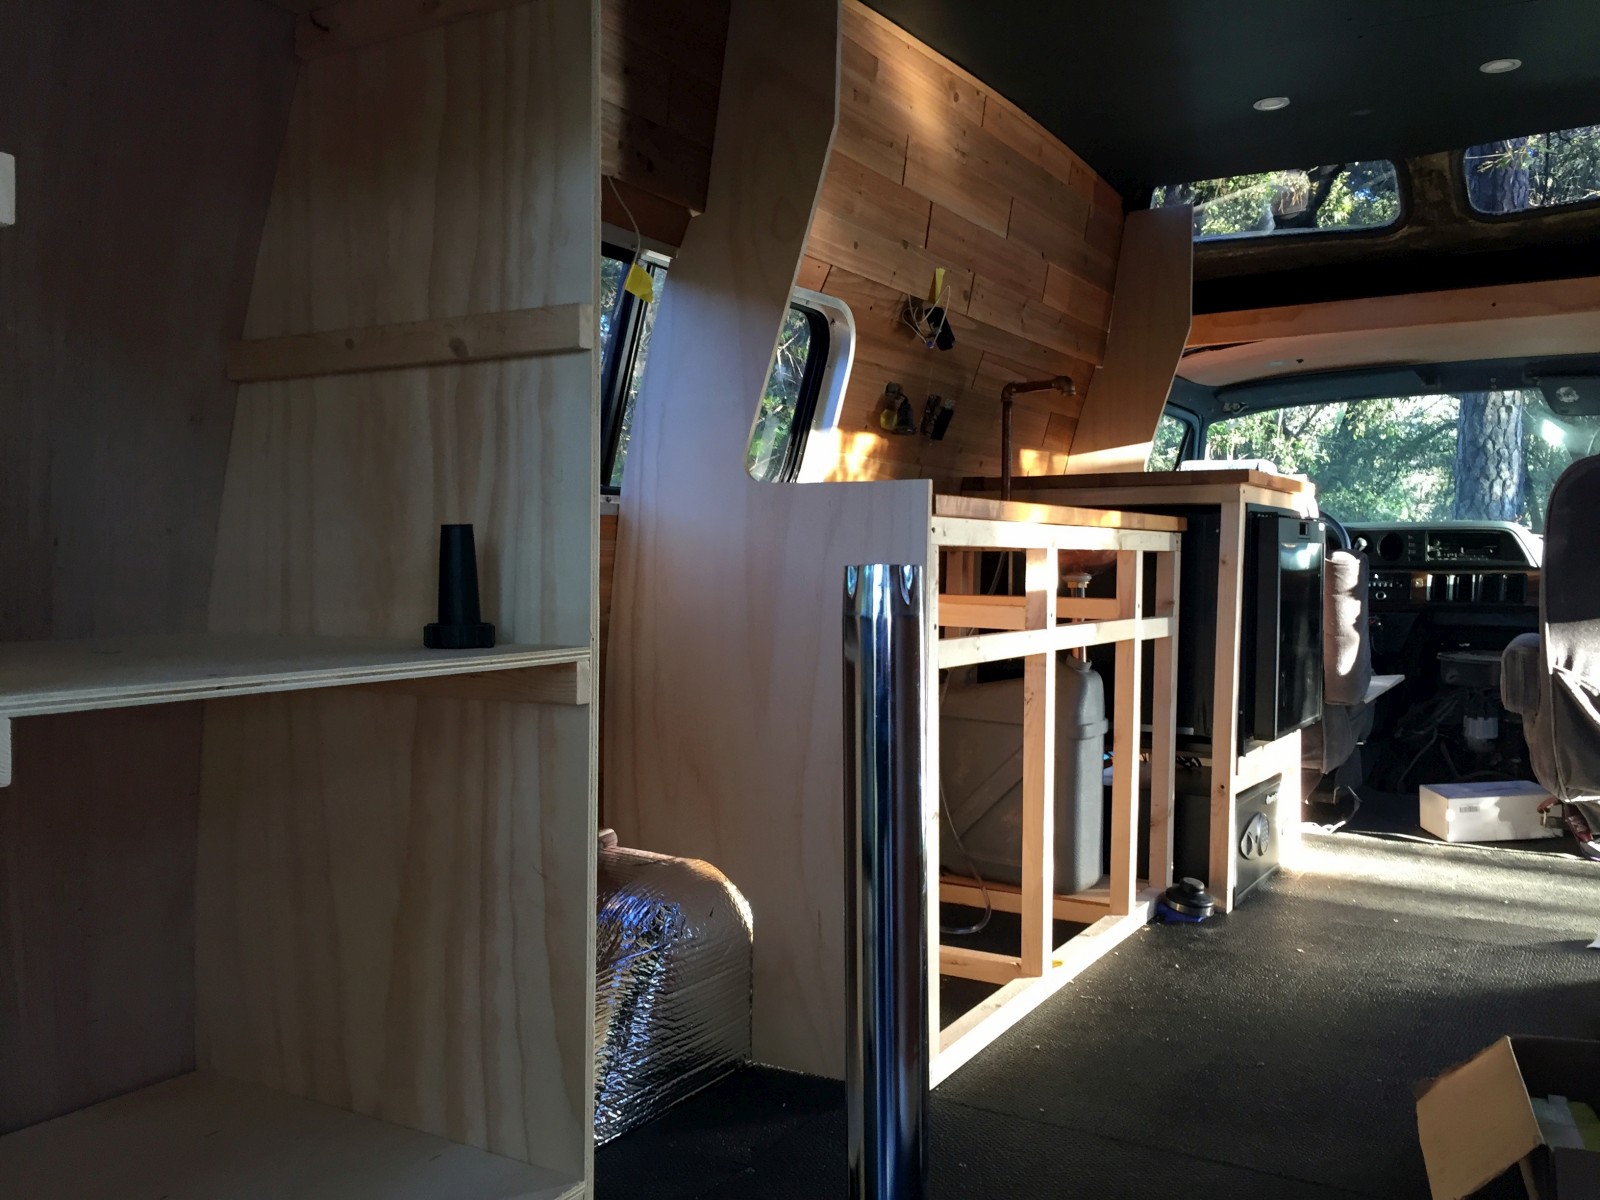
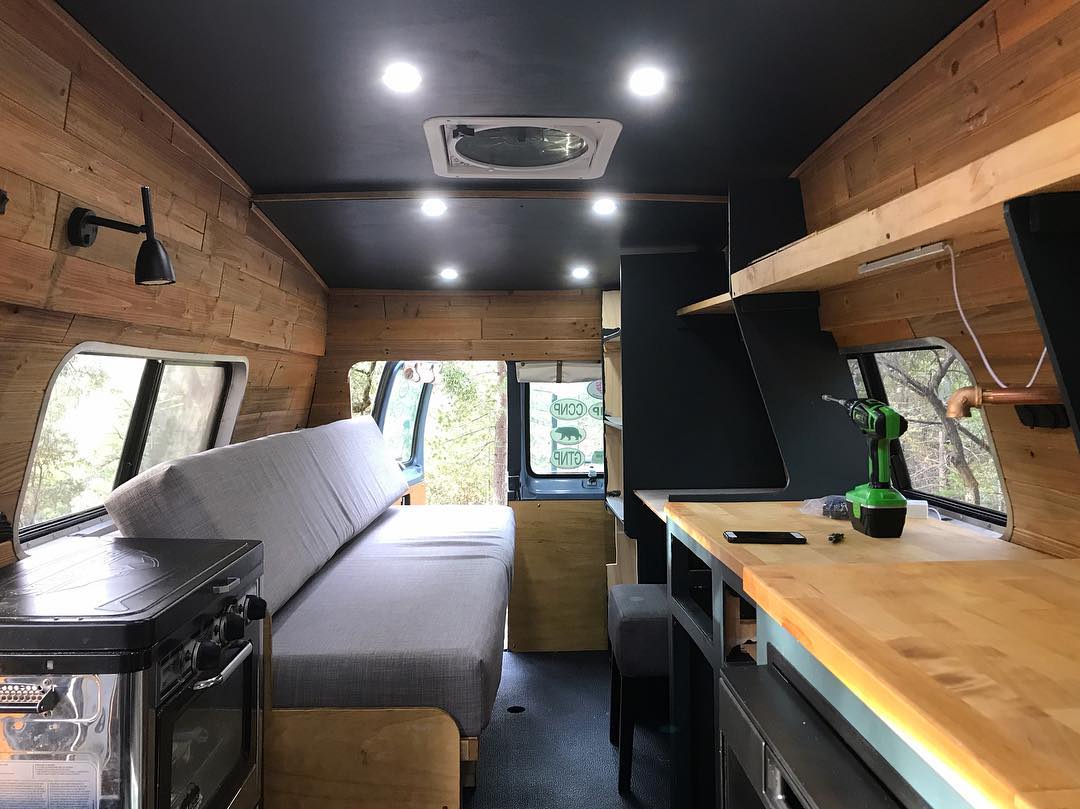
Next came some basic divider walls. Some of these would give a structure for the over-the-counter shelf to attach too. Others would function as a closet (in the rear of the van). Each divider wall had to be cut – from two very expensive pieces of wood – and custom cut to match the curves of the interior wall and height of the ceiling, all of which changed for each divider wall. Scribing out a 6 foot curve was painstaking, and scary. One mistake and the entire thing would be a waste. I had been mentally practicing my scribing method over the past few years in anticipation of this day, and I am happy to report that all four pieces fit great.
Two of those divider walls still needed to be trimmed down to their final state. By removing some of the material it would open up the van without losing the support that will hold the shelf in place. It was as simple as taking a half-triangle-shaped bite out of each wall so there was a line of sight from one side of the counter to the other.
On the following day I added in some additional framing for the drawers and cabinet doors, shelves for the closet, and cut a large circular hole in our butcher block counter top where the sink would be inserted. Things are starting to looking like a usable van again (not vanagon!).
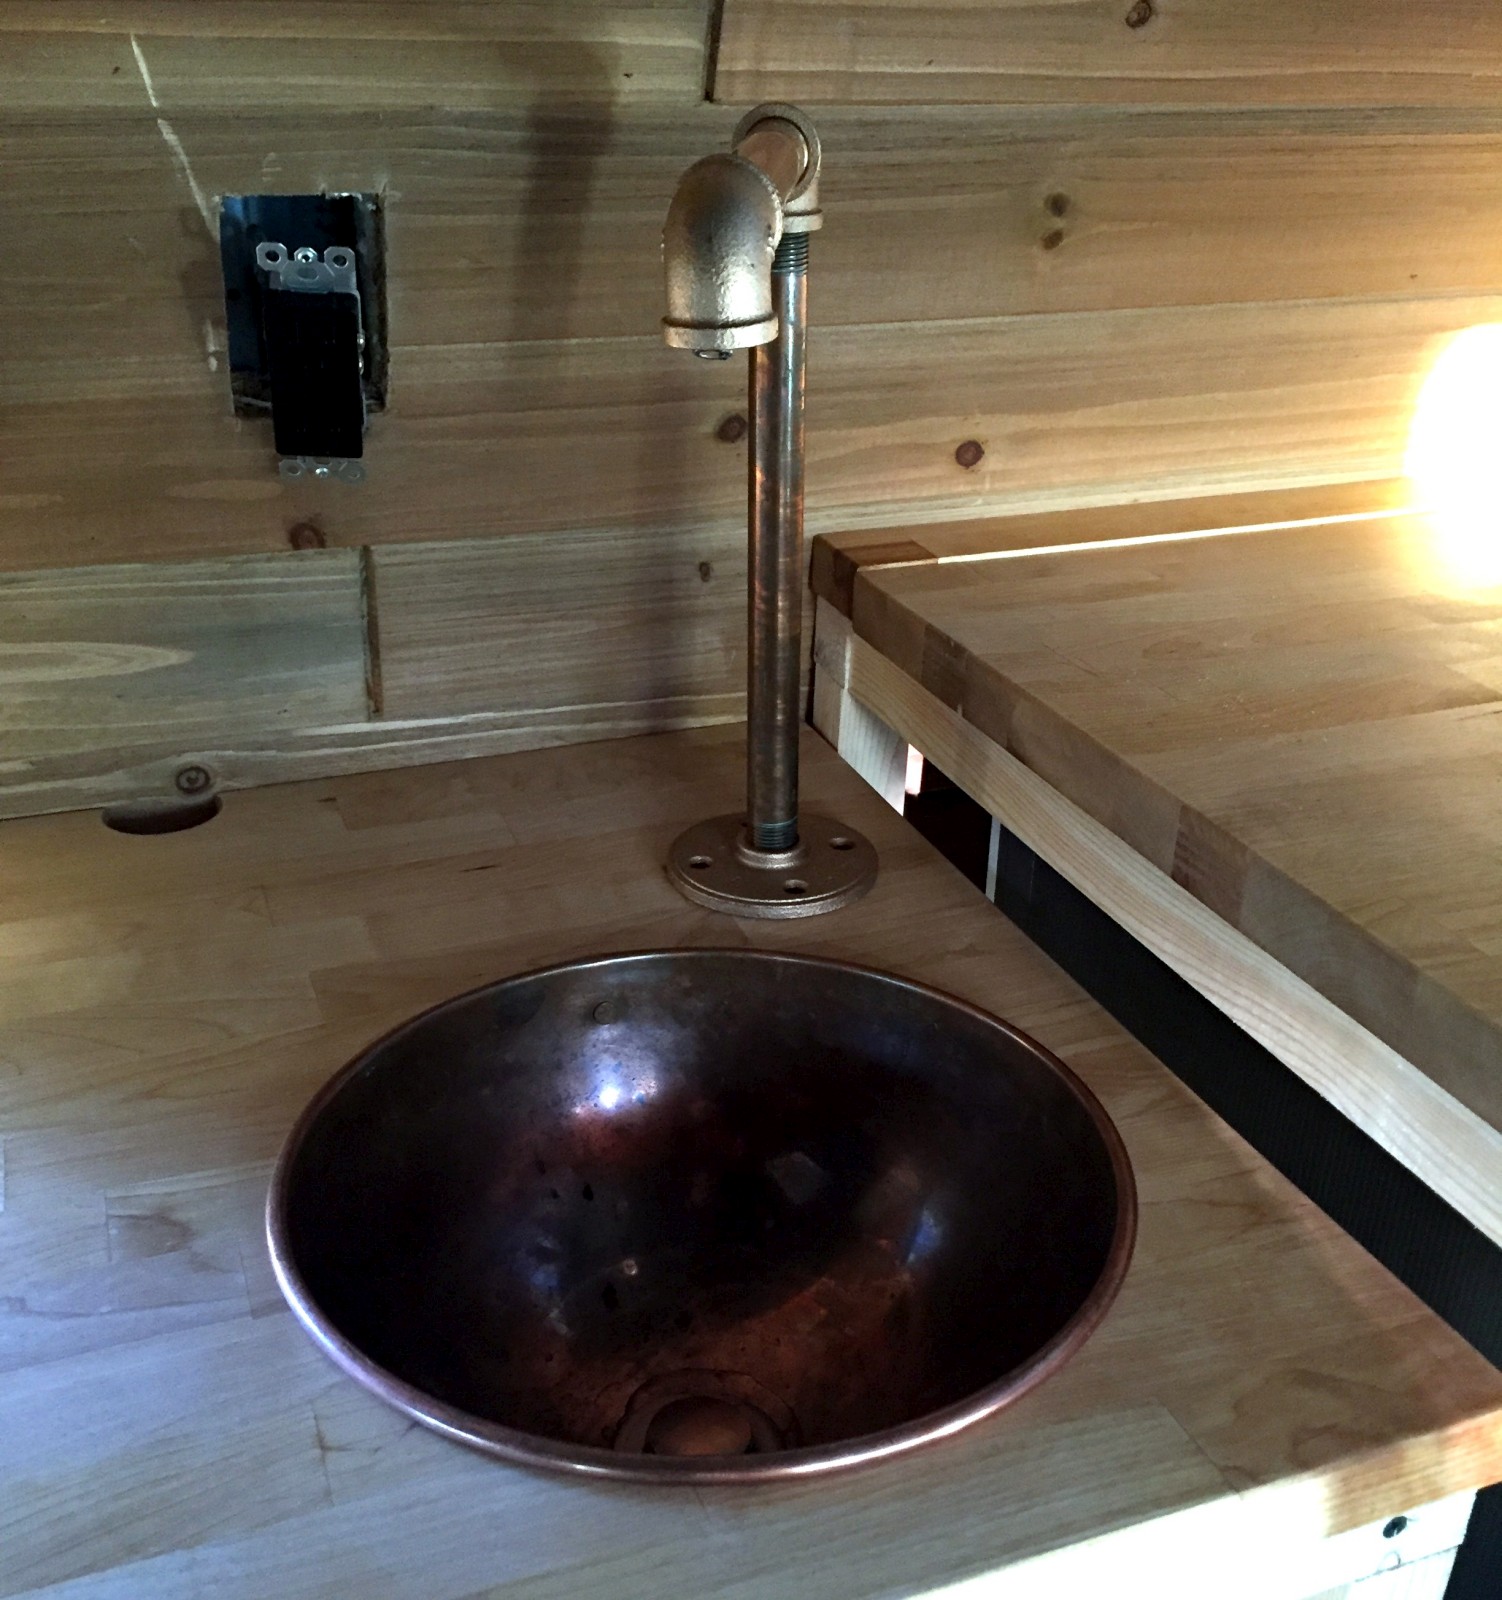 Big Blue will finally have some basic plumbing and the ability to brush teeth (or wash hands) without having to spit out the door. Always a plus when your neighbors are nearby and super judgey (judgee, judgie, judge-ee? Oh who knows!).
Kerri not only hates anything pre-manufactured, she has one hell of an eye for unique looks and design. It was her idea to make the faucet out of copper pipe, which would match the antique hand crafted copper mixing bowl that we re-purposed into a sink. The end result is not only spectacular, it is one of a kind, and will certainly be a talking point when we give tours. A foot pump – nearly hidden in the corner of the two differently sized cabinets – would suck water from our new tank mounted under the van and through the faucet – hands free! The sink will drain directly into a container under the cabinet which can be emptied by hand.
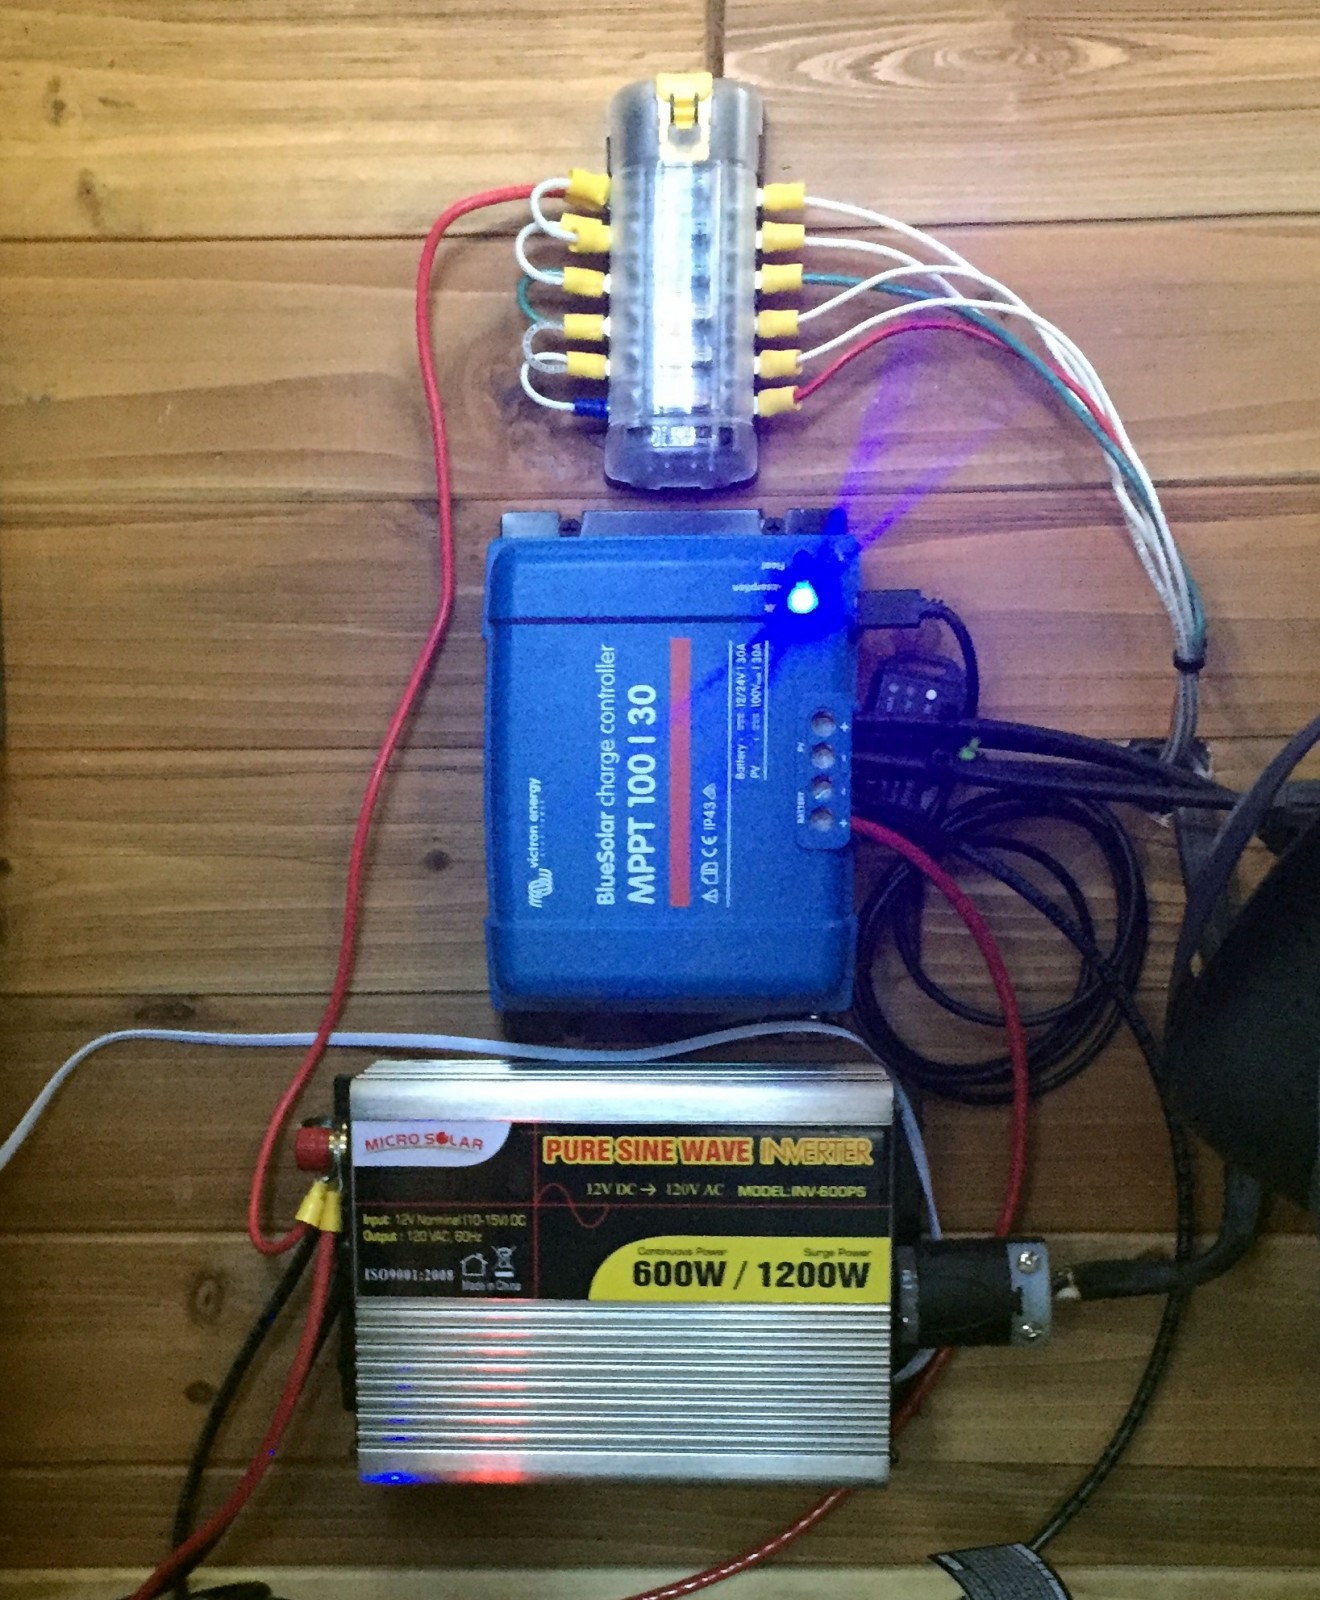 Over three days of Kerri’s hard labor, we removed all the newly built cabinetry to cut the facing for the cabinets, then prime and paint it all. While she worked tirelessly on the paint, I worked on framing out the bed/couch and stove top cabinet. It then took another day to install all the newly painted cabinetry into the van and complete all the battery hookups – because, once that sucker is in place, it is buried under the fridge and I really do not want to have to get to it again.
Funny story (not really); I built the damn bed 1.5 inches too short! There would not be enough room for the portable toilet that needs to fit under the bed due to the mistake. I was measuring from the wrong point, and that is what I get. It was an easy enough fix though… just add a 1.5 inch board to the entire frame underneath to raise it. There, I fixed it!
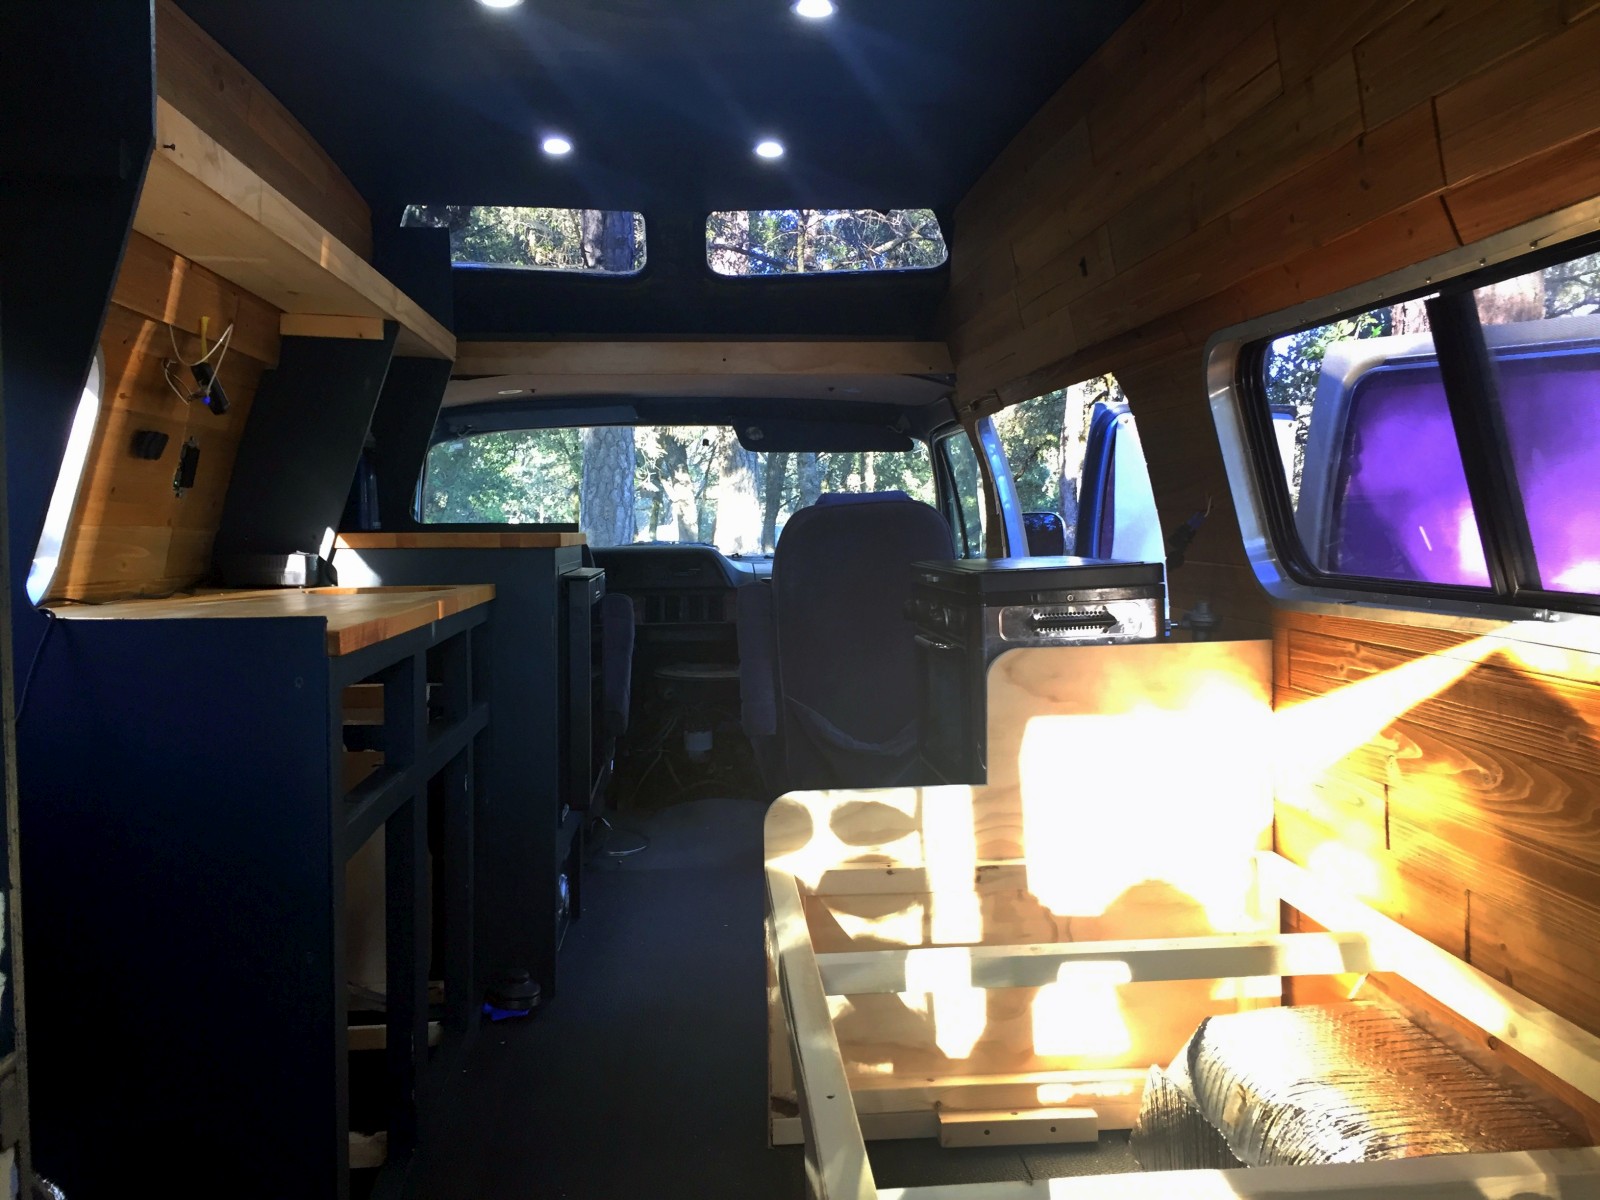
This really completes the main “building” parts of the van. Now it is all the details (arguably more taxing and time consuming) of drawers, doors, and adding the finishing touches. Drawers and doors, that is the next task.
A few more pictures of this past weeks work…
Ah-mazing! Looks awesome, all of it, can’t wait to see what’s next.
Looks great so far. Looking forward to the next steps!
It’s looking amazing! Enjoying tracking your build.
Nina
Which lithium battery did you get and from what seller? Looking hard at these vs. golf cart batteries.
We purchased directly from LifeBlue; the 200ah battery.
http://www.lifebluebattery.com/order-lifeblue-lithium-rv-battery/200ah-lifeblue-lithium-rv-battery.html
If you can handle the price tag, it would be well worth it. Not only can you bring the battery down to 10-15% (means I get a true 180ah to use, not just 100ah with a lead acid or gel) it will charge at burst almost all the way to 100% again.